Christmas/ Holiday Makeup Look
Red lips and Winged eyeliner make an iconic pair that can never go out of style. From Marilyn Monroe to Taylor Swift, you’ve seen them all rocking this look in reel life and red carpets. What makes it even better is the fact that it doesn’t require expertise. You can be a beginner in makeup but still wear the look and pull it off like a pro. Another brownie point? You don’t need a tonne of makeup to achieve it. For today’s post, I’ve created a makeup look for parties and events that is easy to recreate and goes with almost every outfit. And of course, it involves a bold red pout and sharp winged eyeliner. Start with a notebook in your hand because I’ll be giving you a lot of makeup tricks!
 Easy Makeup Look For Parties
Step 1: Prep the Face
Cleanse and moisturize your face properly before putting on any makeup. And don’t forget to properly moisturize the area around your eyes and mouth, that’s where the foundation and concealer start clinging first.
Step 2: Ace the Base
The secret behind perfecting a makeup look is a flawless base. Start with a primer, I use a pore-blurring one to fill in my pores and get an even canvas. This step makes the foundation glide better and look flawless. If you don’t own a primer, you can jump to the next step, i.e, foundation. The one I’ve used has medium coverage so it evens out my skin tone and also hides minor blemishes. But it fails to hide my dark circles completely so I use a concealer to make me look awake and brightened up.
Now it’s time to set everything in place and I used a translucent powder that gives a really soft look by blurring out the pores. It doesn’t look cakey and will look good even if you have dry skin.
 Step 1: Makeup Base
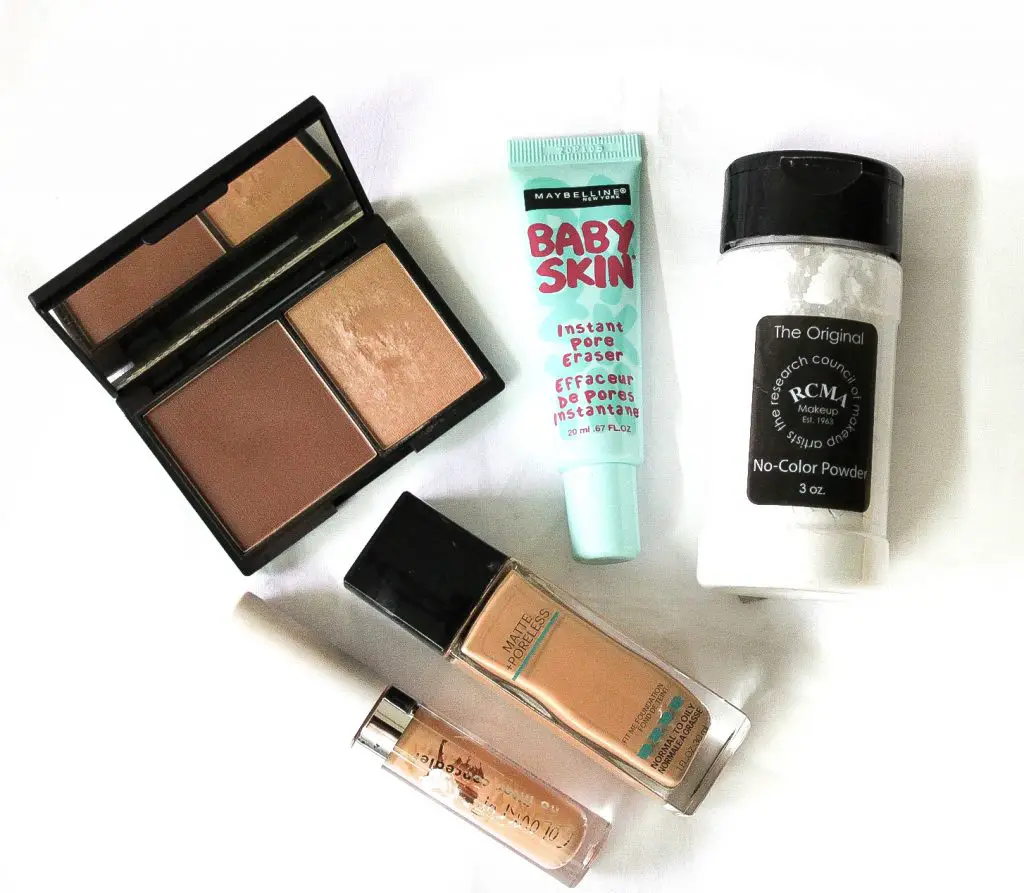
Products I used for my base:
Primer – Maybelline Instant Pore Eraser Primer
Foundation – Maybelline Fitme Matte + Poreless Foundation in shade “310 Sun Beige”
Concealer – Colourpop No Filter Concealer in shade “32 Medium Dark”
Setting Powder – RCMA No Color Powder
 Base Makeup products
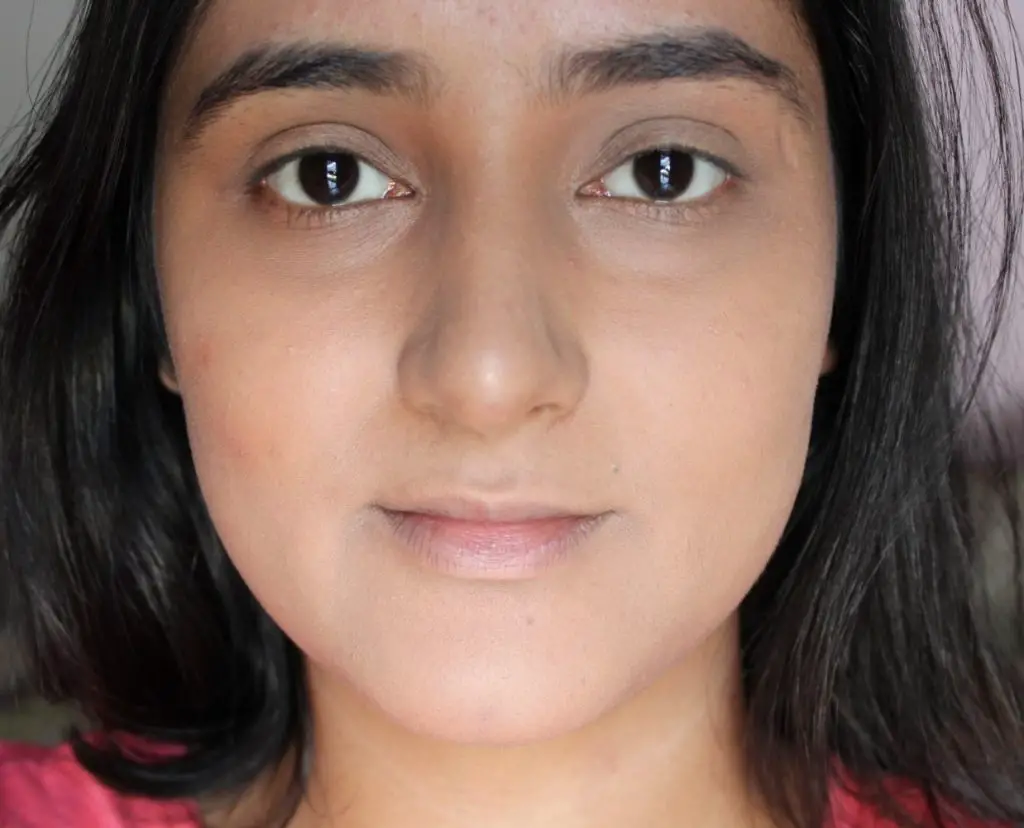
Step 3: Give Dimensions to the Blank Canvas
If you look at the picture, my face looks very pale and blank after applying base makeup. Hence, it is important to bring some colours and life back to the face. I contoured my jawline and cheeks to give it some dimension and then highlighted my cheekbones using a champagne shade. I also took some highlighter above the brows.
The Beauty Wonk Says, keep buffing in the highlighter to make it look natural and blended out.
Here’s a closeup shot:
 Highlighter for Natural Look
Product used:
Contour & Highlight – Sleek Contour & Highlight Kit in “Medium”
I used the same red lipstick as a blush here, of course, I went very light-handed with it. Feel free to use a coral or earthy-toned blush or maybe a lipstick!
Step 4: It’s All in the Eyes
Many people are scared of experimenting with eyeshadows so we’re going to keep it very simple here. All you have to do is contour your crease.
What’s crease? It’s the hollow part between your eyelids and brow bones.
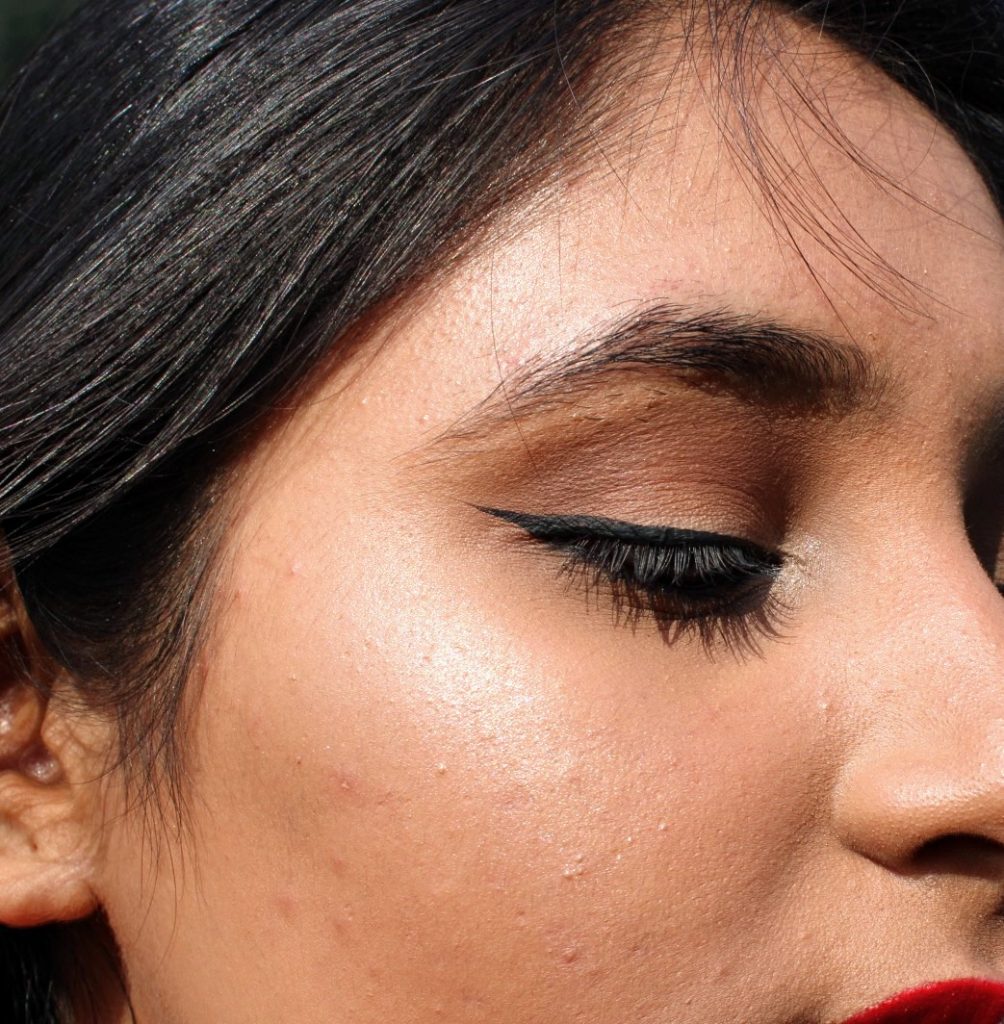
Take a brown shade, that’s two-tone darker than your skin colour and apply it to your crease in a to and fro motion. I used the contour shade from the Sleek palette I mentioned before and a fluffy eyeshadow brush. Of course, you can skip this step but I feel it gives your eyes some depth and melts in beautifully with the contour on the rest of the face.
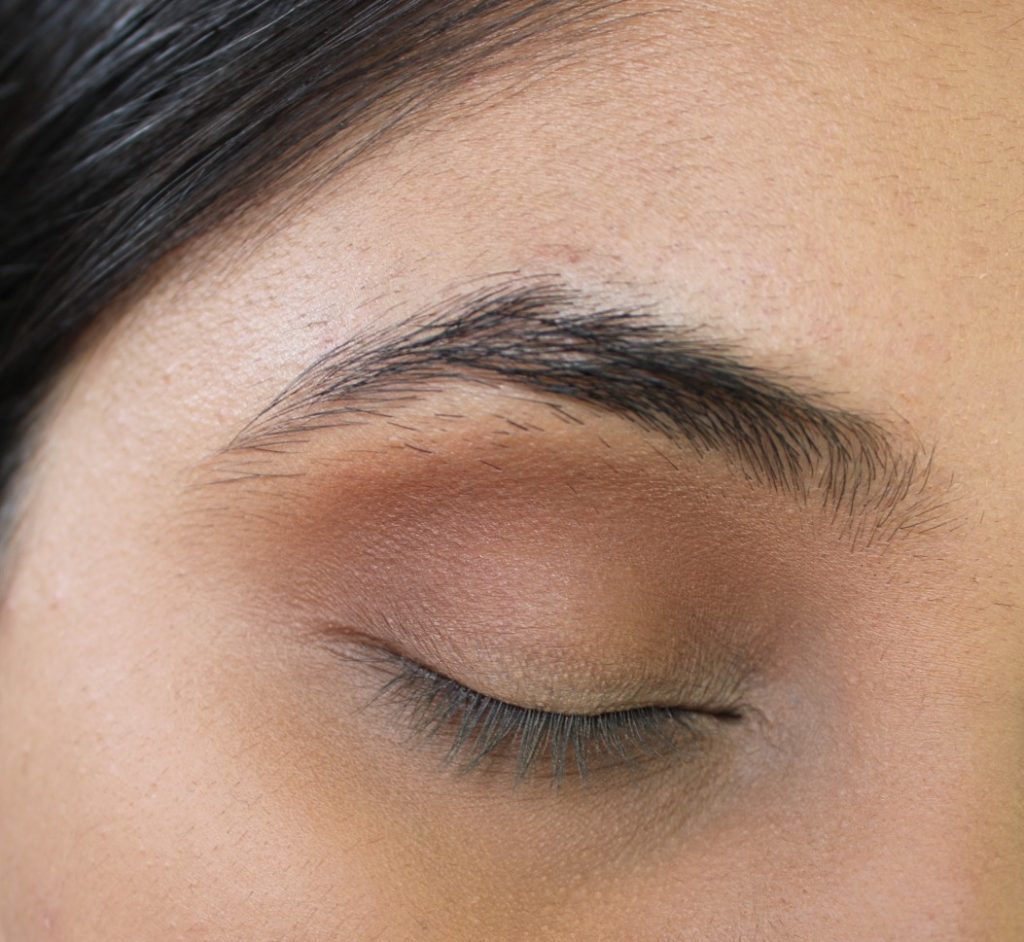 How to Apply Eyeshadow on Crease
Then I applied some kajal, filled in my brows to make it look fuller yet natural. Coming to winged liner, there’s no tip on how to perfect it in one go, you have to keep practising until you’re able to. The last step is to apply a lot of mascara to get long, voluminous lashes.
Eye products used:
Kajal – Faces Magneteyes Kajal
Eyebrow – Colourpop Precision Brow Pencil in shade “Black N’ Brown”
Eyeliner – Essence Liquid Ink Eyeliner
Mascara – Essence Lash Princess False Lash Effect Mascara
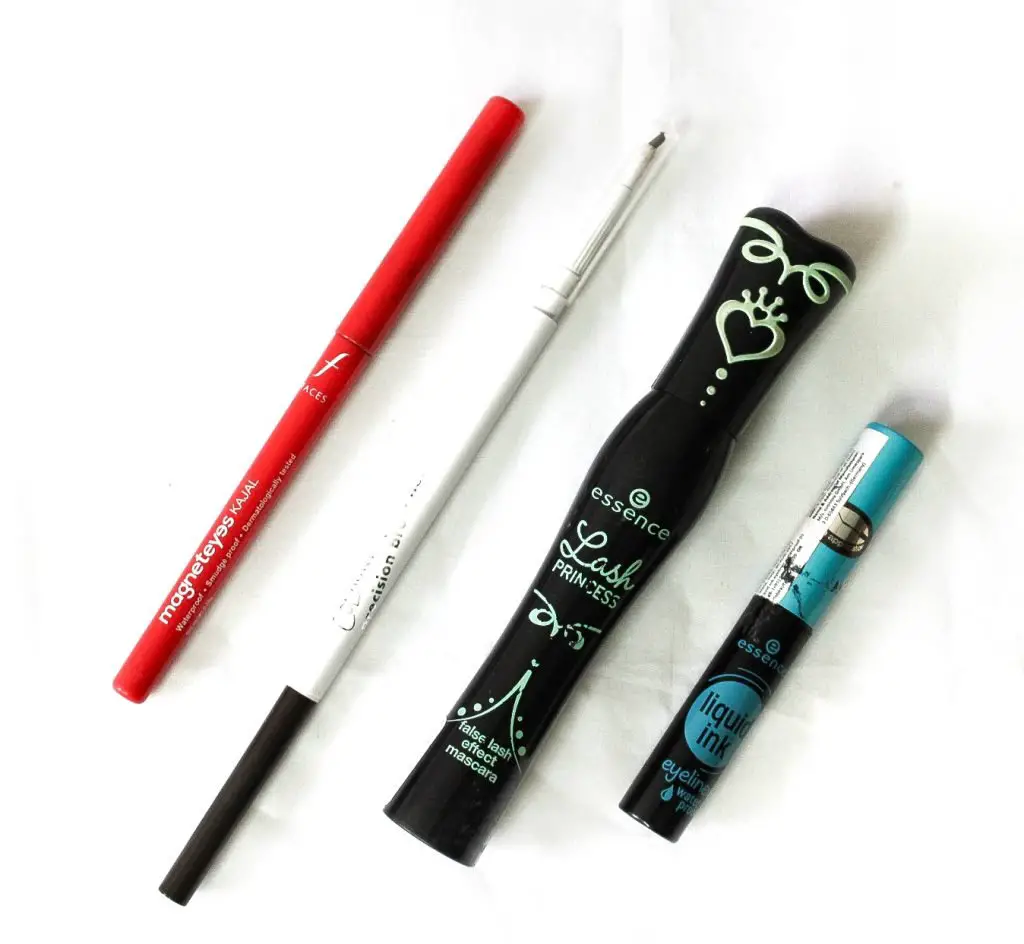 Eye Makeup Products Used
Step 5: Lips Don’t Lie
Coming to the star of the party makeup look – the bold red pout! Be careful while applying a dark lipstick and keep your concealer handy to rectify mistakes. The lipstick is the only high-end product I’m using in this look, otherwise, everything mentioned here is drugstore makeup. You can use whichever lipstick you have. Make sure to exfoliate your lips!
Product Used:
Lipstick – MAC Retro Matte Lipstick in “Ruby Woo”
Makeup Tools:
I have used my Real Techniques brushes for face and Wet N Wild Crease Eyeshadow Brush for eye makeup.
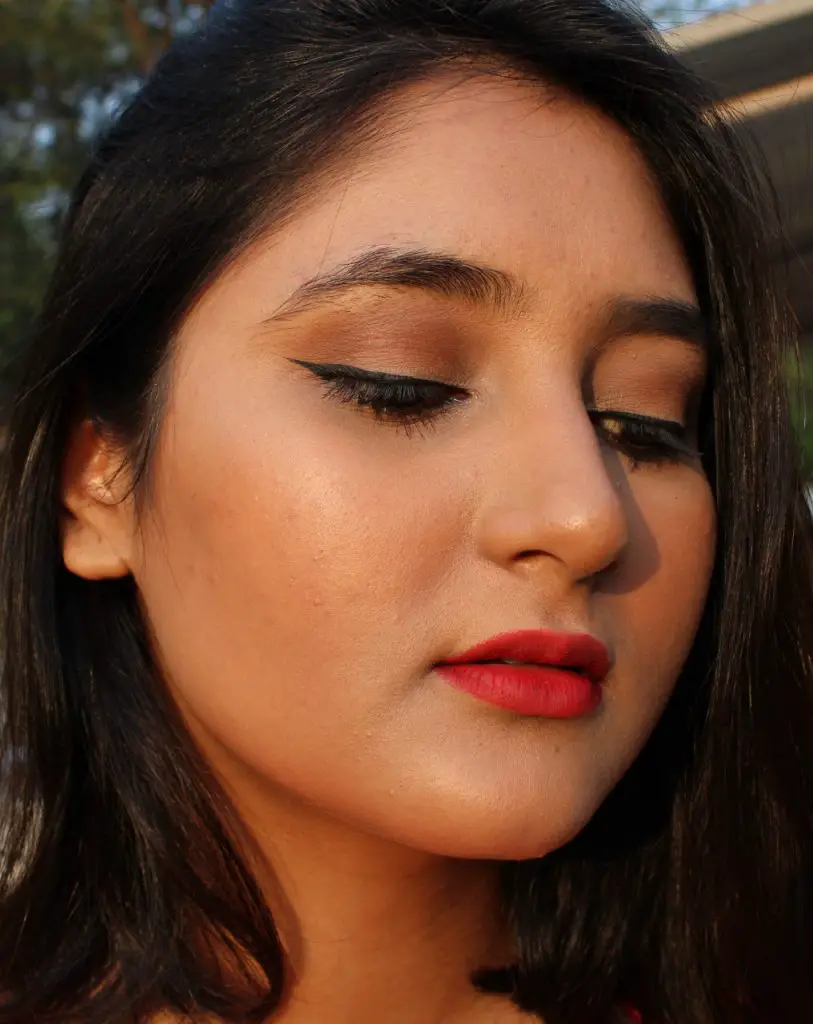
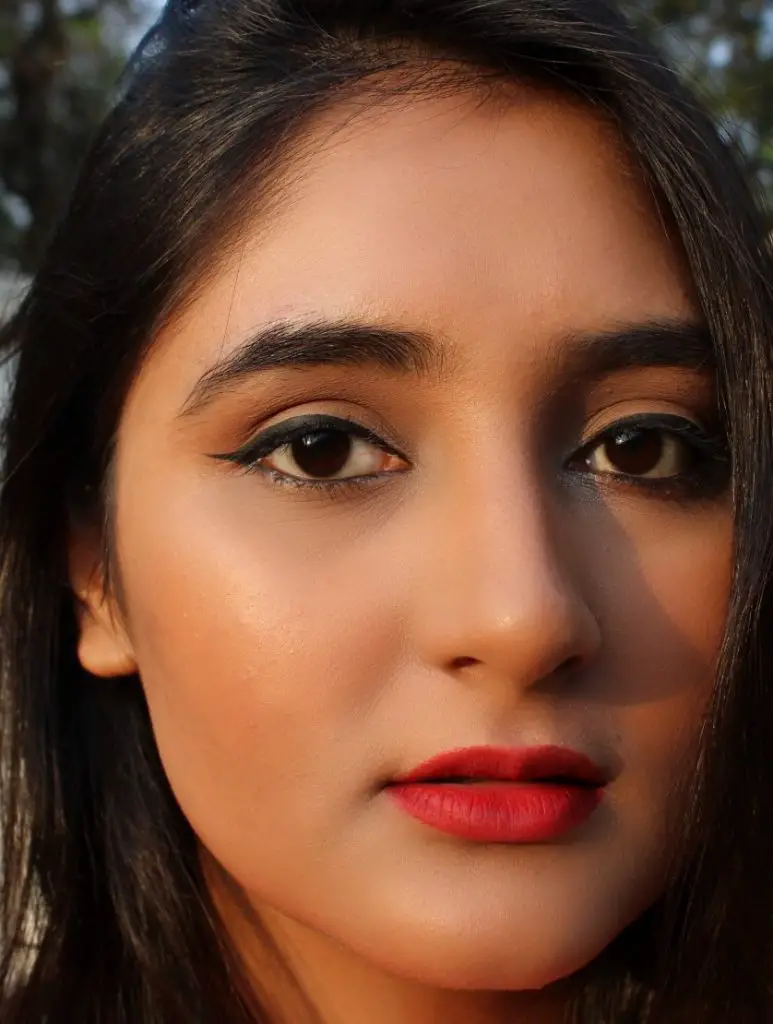 Red Lips and Winged Eyeliner
Everything you see here is how the makeup looks in real life, unlike Instagram makeup. It’s doable and wearable! You can wear this makeup look for parties, date night, weddings and even to brunch if you want to. Hope you enjoyed this post and learnt a few basic makeup tricks. Let me know in the comment section what kind of looks do you want me to create and teach you guys!
Leave a Reply